

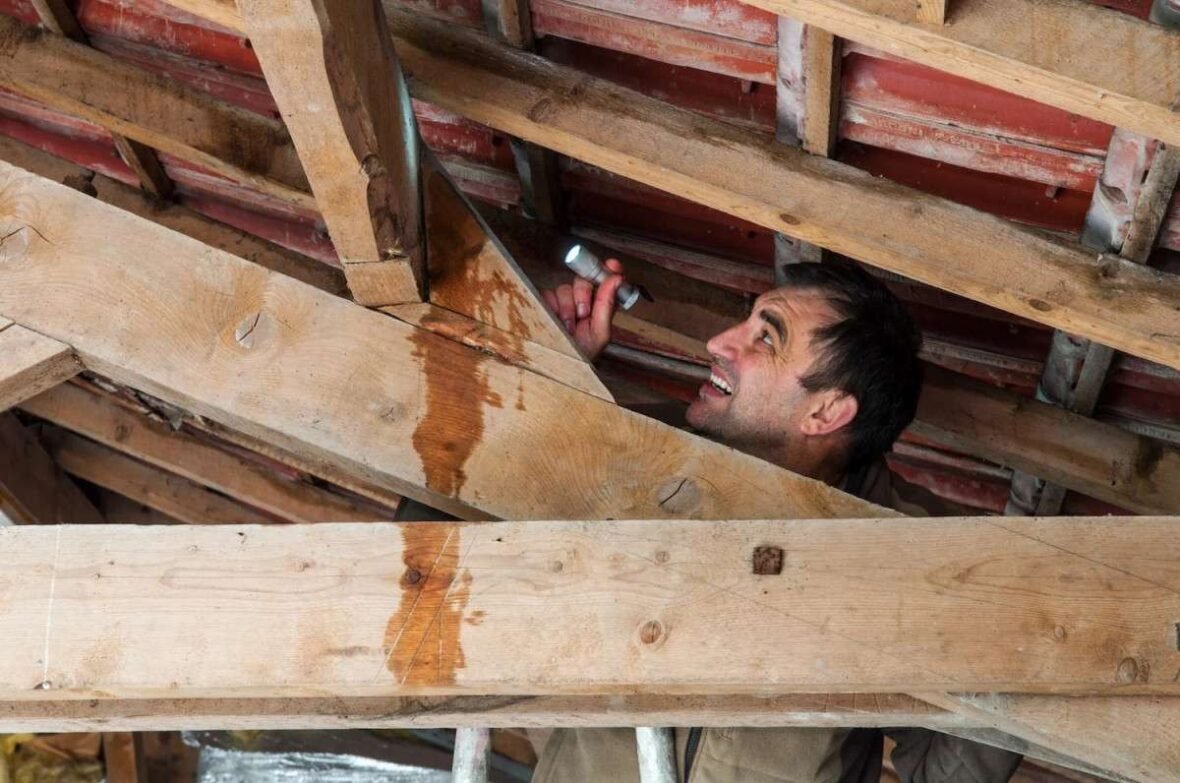
Finding a roof leak from the outside starts not on the roof but in the attic — with a flashlight, a tape measure, and a reference point that lets you translate the interior water stain into an outdoor search area. The ceiling stain in the living room is the end of the water’s path, not the beginning. The actual hole in the roof is almost always uphill from the stain, sometimes by 10 feet or more, because water runs down the underside of the roof deck before it drips onto the insulation and through the drywall.
Once you have mapped the interior stain to an area on the roof, the outside inspection follows a predictable pattern: check the flashings first, then the penetrations, then the shingles or panels, then the valleys. In roughly 80% of residential roof leaks, the problem is a flashing failure — a metal seam that has separated, a sealant joint that has cracked, or a rubber boot that has split. The shingles themselves are rarely the source unless the roof is past its design life.
Step 1: Map the Interior Leak to the Roof Surface
The first and most important step happens inside the house, not on the roof. You need a fixed reference point that is visible from both the attic and the exterior, so you can translate the ceiling stain into a specific location on the roof.
- Go into the attic above the water stain. Bring a flashlight, a tape measure, and a thin wooden dowel or a straightened wire coat hanger. Clear the insulation away from the area around the stain.
- Find a fixed penetration that goes through the roof. A plumbing vent pipe, an electrical conduit, a bathroom fan duct, or a chimney. Measure the distance from that penetration to the wet spot on the deck. Write down the measurement — for example, “4 feet south and 2 feet west of the main plumbing vent.”
- If the water is traveling down a rafter or a roof truss, trace it uphill. Look at the top edge of the framing member — a water streak on top of a rafter means the leak is farther up the roof, and the water is running along the rafter before dripping off at a lower point. Follow the streak to its highest point on the wood.
- Mark the spot with a finish nail driven up through the deck. Push a 2-inch finishing nail through the roof deck at the highest point of the water damage. The nail will poke through the shingles or underlayment on the outside and mark the approximate location of the leak for the exterior inspection.
If you have no attic access — common on cathedral ceilings and roof assemblies with spray-foam insulation — skip this step and go directly to the outside inspection. Use the interior stain’s position relative to exterior features (the chimney, a dormer, a plumbing vent on the roof) to estimate the search area. The water test method (below) is the most reliable approach for inaccessible attics.
Step 2: Inspect the Roof from the Ground with Binoculars
A pair of 10×42 binoculars reveals more than most homeowners expect. From the ground, you can see missing shingles, lifted flashing, rust streaks, and debris accumulation — all without setting up a ladder.
Walk around the house and scan each roof face systematically, starting at the eave and working up to the ridge. Look for:
- Missing, curled, or lifted shingles. A shingle that is not lying flat allows water to run underneath. A missing shingle is an open hole.
- Rust streaks running down from a specific fastener, flashing, or chimney. Rust is a water trail — it marks the path water has been following. Follow the rust uphill to its source.
- Debris piled in valleys or behind chimneys. Wet leaves hold moisture against the roofing material for days after a rain and create the conditions for a leak that would not occur on a clean roof.
- Damaged or missing pipe boots. Look at every plumbing vent pipe. If the rubber collar around the pipe is cracked, split, or lifted above the pipe, it is a leak source.
- Gaps at the flashing where a wall meets the roof. Look at dormer sidewalls, chimney sides, and anywhere a vertical wall meets the roof. The metal step flashing should be tight against the wall with no visible gaps between the flashing pieces.
If you find an obvious problem — a missing shingle, a lifted flashing, a cracked pipe boot — mark its location and proceed directly to repair. If the roof looks intact from the ground, the leak is subtle and requires a closer inspection on the roof surface.
Step 3: Inspect the Roof Surface Up Close
If the binocular inspection did not reveal the leak, set up an extension ladder and inspect the roof surface directly in the area identified in Step 1. Work from the ladder whenever possible — walking on the roof risks damaging the roofing material and is dangerous on steep or wet roofs.
In the search area, inspect each of these features in order:
- All flashings first. Check every metal-to-shingle transition. Run your finger along the top edge of step flashing at a wall — if you feel sealant that has separated from the metal, water is entering that gap. Check chimney flashing at the corners, where the side flashing meets the front apron and the back pan. The corners are the most common chimney leak points.
- All penetrations second. Inspect every pipe boot, vent cap, and exhaust hood. Press your thumb against the rubber collar of each pipe boot — if it feels hard and brittle instead of pliable, it is leaking or about to leak. Check the sealant around the base of every vent cap.
- Shingles third. Look for shingles that are creased, torn, or missing granules in a pattern that does not match the surrounding roof. A single damaged shingle in an otherwise intact roof face is a leak source. Multiple damaged shingles across the entire roof face suggest age-related failure and may require a larger repair.
- Valleys last. If the leak is near a valley, inspect the valley centerline for missing shingle edges, exposed underlayment, or debris accumulation. Water in a valley is moving fast and under volume — even a small gap in the shingle edge at the valley centerline can admit a significant amount of water.
Ladder safety rules for roof inspection: Set the ladder at a 4:1 angle (1 foot of base distance for every 4 feet of height). Tie the ladder off at the top. Never walk on a roof with a pitch steeper than 6:12 without fall protection. Never walk on a wet roof. Never walk on tile, slate, or wood shake — these materials break underfoot.
Step 4: The Water Test — When Visual Inspection Is Not Enough
If the visual inspection finds nothing but the ceiling is still getting wet when it rains, the leak is too small or too subtle to see. The water test forces the leak to reveal itself by applying water in a controlled sequence.
- Work with a partner. One person stays in the attic at the leak location. The other goes onto the roof with a garden hose. Communicate by cell phone.
- Start at the lowest point of the roof in the search area. Soak a 3-by-3-foot section at the eave for 5 minutes. Wait. If no water appears inside, move the hose uphill 3 feet and repeat.
- When water appears inside, you have found the general area. Narrow the search by directing the hose to specific features in that section — first the flashing, then each penetration, then individual shingles — soaking each for 3 to 5 minutes.
- Mark the leak location. When you find the exact entry point, mark it on the roof with blue painter’s tape. Drive a finish nail up from the attic side to mark the deck location for the roofer.
The water test is tedious but definitive. A leak that cannot be found by visual inspection will reveal itself to a garden hose. The only rule that cannot be skipped is the 5-minute soak time — water takes minutes to saturate the underlayment and drip through the deck, and moving the hose too fast produces false negatives.
When to Call a Professional Roofer Instead
Stop the DIY inspection and call a roofer if: the roof pitch is steeper than 6:12; the roof is two stories high and you do not own a 28-foot extension ladder; the leak is near a chimney on a steep roof (chimney access is awkward and dangerous); you have found the leak but it involves replacing flashing or decking (those repairs require removing shingles and re-integrating the waterproofing layers, which is beyond most DIY skill levels); or you have spent two hours searching and have not found the leak.
A professional leak detection visit costs $150 to $400 depending on the roof’s complexity and height. The cost is typically credited toward the repair if you hire the same contractor to fix the leak. A $300 diagnostic visit that finds a leak and prevents a $1,500 ceiling replacement is money well spent.
FAQ: Common Questions About Finding Roof Leaks
Why does my roof only leak during heavy rain?
Heavy rain overcomes the surface tension that keeps water on top of the roofing material during light rain. A small gap at a flashing or a cracked shingle edge that sheds light rain without leaking admits water when the volume of water flowing over it increases. The leak is always present — it is just below the threshold of visibility during light rain. The water test replicates heavy rain by concentrating flow on a small area, which is why it finds leaks that light rain misses.
The ceiling stain is in the middle of the room. Could the leak be far from there?
Yes, and it usually is. Water runs along rafters, across the top of the drywall, or along electrical cables and plumbing pipes before dripping through a light fixture hole or a drywall seam. The ceiling penetration — a light fixture, a smoke detector, a drywall joint — is the low point in a horizontal path, not the vertical projection of the roof hole. Always trace the water uphill in the attic before assuming the roof leak is directly above the stain.
Start in the Attic, Finish on the Roof
The most efficient sequence for finding a roof leak from the outside is: attic mapping (Step 1) → ground-level binocular scan (Step 2) → on-roof close inspection (Step 3) → water test if necessary (Step 4). Most leaks reveal themselves at Step 2 or 3. The leaks that reach Step 4 are the subtle ones — pinhole flashing gaps, hairline boot cracks, end-lap separations — that are invisible to the eye but reveal themselves to a garden hose in 5 minutes.
The flashing, the pipe boot, and the valley are the three places to look first. The shingle in the middle of the roof face is the last place to look. Flashing fails before shingles do, and the vast majority of roof leaks in houses under 20 years old are flashing failures dressed up as roof leaks.