

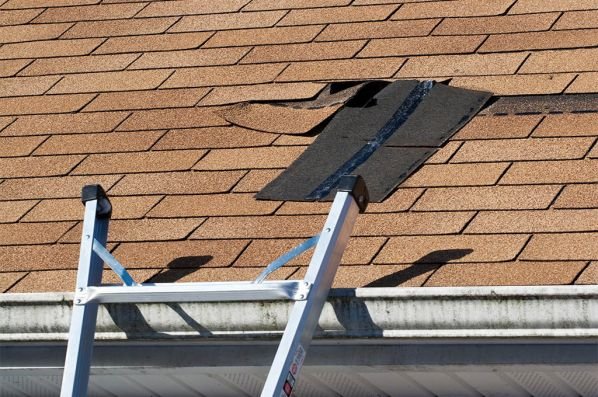
Finding a roof leak without attic access means you cannot trace the water from the inside, cannot follow the stain uphill along a rafter, and cannot drive a finish nail through the deck to mark the leak location on the roof. You are working blind from the inside — the ceiling stain is the only interior evidence — and you have to find the hole in the roof using exterior methods only. It is slower and less precise than the attic-access method, but it is not impossible.
The strategy shifts from “trace the water backward” to “systematically rule out every likely leak source in the search area until the garden hose forces the leak to reveal itself.” The sequence: map the interior stain to a roof search area using exterior reference points, inspect that area from the ground with binoculars, inspect it up close from a ladder, and run a controlled water test if the visual inspection does not find the leak. The water test is more important without attic access because it is the only way to confirm that you have found the correct entry point.
Step 1: Map the Interior Stain to the Roof Surface
Without attic access, you cannot see the underside of the roof deck. You have to triangulate the leak location using exterior reference points that are visible from both inside and outside the house.
- Measure from the stain to the nearest exterior wall. Stand in the room with the ceiling stain and measure the distance from the center of the stain to the nearest exterior wall — the wall that faces the outside of the house, not an interior partition wall. Write down the measurement.
- Measure from the stain to a fixed interior feature lined up with a roof penetration. A plumbing vent pipe in the wall above the bathroom. A chimney that passes through the ceiling. A skylight. Measure from the stain to that feature.
- Go outside and find those same reference points on the roof. The exterior wall is visible from the ground. The plumbing vent pipe pokes through the roof above the bathroom. The chimney is visible from anywhere. Transfer your interior measurements to the roof surface: if the stain is 4 feet from the east wall and 6 feet from the plumbing vent, the leak is in a 4-by-6-foot rectangle on the roof defined by those two lines.
- Mark the search area mentally or with chalk on the ground. You are looking for a rectangular area on the roof roughly 10 feet wide by 10 feet long, centered on your triangulated point. The actual hole is inside that area, somewhere uphill from the stain.
Why the search area must be larger than the stain: Water on a roof without attic access still travels laterally. On a cathedral ceiling with insulation between the rafters, water can run down the top side of the insulation baffle for several feet before dropping through a gap. On a roof with spray-foam insulation, water can travel between the foam and the deck before finding a crack in the foam where it can reach the drywall. The hole in the roof is always uphill — sometimes only a few feet, sometimes 10 feet or more — from the stain.
Step 2: Inspect the Search Area from the Ground and from a Ladder
Start with binoculars from the ground. Scan the search area for the same visual clues you would look for on any roof: missing shingles, lifted flashing, rust streaks, debris in valleys, cracked pipe boots, gaps at wall-to-roof junctions. The binocular inspection alone finds roughly 60% of leaks — the ones with visible damage.
If the binocular scan finds nothing, set up an extension ladder at the eave below the search area. Work from the ladder whenever possible — do not walk on the roof unless the pitch is 4:12 or less and the roof is dry. Inspect the search area in order of leak probability:
- Flashings first. Check every wall-to-roof junction, chimney side, and skylight curb in the search area. Run your finger along the top edge of step flashing — if you feel sealant that has separated from the metal, water is entering.
- Penetrations second. Inspect every pipe boot, vent cap, and exhaust hood. Press your thumb against each rubber collar — hard and brittle means failed.
- Valleys third. If the search area includes a valley, check the shingle edges along the valley centerline for gaps, exposed underlayment, or debris accumulation.
- Shingles last. Look for creased, torn, or missing shingles. A single damaged shingle in an intact roof face is a leak source.
Step 3: The One-Person Water Test (No Attic Observer)
Without an attic observer, the water test takes longer because you have to keep running back inside to check for water. A partner still helps enormously — one person on the roof with the hose, one person inside watching the ceiling — but if you are working alone, you can still perform the test with patience.
- Set up the hose on the roof in the search area. If you have a partner, they stay inside at the ceiling stain. If you are alone, set a timer on your phone and plan to climb down and check the ceiling after every test interval.
- Start at the lowest point of the search area. Soak a 5-by-5-foot section for 10 minutes. Climb down and check the ceiling. If the stain is dry, move the hose uphill 5 feet and repeat.
- When the ceiling stain darkens or expands, you have found the general area. The leak is in the section you are currently soaking. Narrow the search: direct the hose to one feature at a time — the flashing, then the penetration, then a specific shingle — soaking each for 5 to 10 minutes and checking the ceiling after each one.
- Mark the leak location. Circle the leak source with a grease pencil or blue painter’s tape on the roof surface. Do not use chalk — it washes off.
The 10-minute soak rule is not optional without attic access. With an attic observer, you can see water the moment it drips through the deck. Without an observer, you only see water when it soaks through the insulation, the drywall, and the paint — a process that takes 5 to 10 minutes after the water first enters the deck. If you move the hose after 3 minutes, you will skip past the leak and produce a false negative. Set an actual timer.
Step 4: The Dye Test — When Water Alone Is Not Enough
If the water test soaks the entire search area and the ceiling remains dry, the leak may be entering at a location you cannot see — a parapet wall cap, a through-wall flashing on a chimney, or a penetration on the other side of a ridge. The dye test adds a visual tracer to the water so you can identify exactly which path the water is taking.
Spray a small amount of fluorescent dye tracer (available at plumbing supply stores for $10 to $15) onto specific suspect areas on the roof — one area at a time. Apply a different color to each suspect if you have multiple dyes. Run water over each area as in the water test. When the stain darkens, use a UV flashlight ($15 to $25) to check which color dye appears at the ceiling stain. The color identifies which suspect area is the leak source.
The dye test is more effort than the plain water test — you need to buy the dye and the UV light, and you need to apply the dye in a way that does not wash it off the roof before you start the water test. Use it only when the plain water test fails to identify the leak after a systematic search of the entire suspect area. Most leaks are found without dye.
Step 5: Thermal Imaging — The Professional Method
If the water test and dye test both fail — or if you prefer to skip directly to the most reliable method — thermal imaging is the standard tool that professional leak detection companies use for roofs without attic access. A thermal camera detects temperature differences caused by wet insulation, which retains heat differently than dry insulation.
The scan is performed from inside the house, not on the roof. The technician points the thermal camera at the ceiling in the area of the stain and looks for a cold spot — wet insulation is colder than dry insulation because water conducts heat away from the interior more efficiently. The cold spot on the thermal image traces back to the point where water is entering the insulation cavity, which maps to the hole in the roof. Professional thermal leak detection costs $300 to $600 for a standard residential scan.
Thermal imaging is most effective in the early morning after a cold night, when the temperature difference between wet and dry insulation is largest. It is least effective in the middle of a hot afternoon, when the entire roof assembly is the same temperature.
When to Cut Into the Ceiling for Access
At some point, the time and frustration of finding a leak without attic access exceeds the cost and inconvenience of cutting an inspection hole in the ceiling. If you have spent 3 hours on the water test without finding the leak, cut the drywall.
An inspection hole — roughly 12 inches by 12 inches, cut directly at the ceiling stain — allows you to look up into the insulation cavity, see the underside of the roof deck, and trace the water path with a flashlight. The hole costs $150 to $300 to patch and paint after the leak is fixed. Three hours of your time on a ladder with a garden hose is worth more than $300. Cut the hole, find the leak, fix the leak, and patch the ceiling once. The alternative is patching the ceiling anyway — because the water stain will need to be primed and painted regardless — plus the hours of frustration.
FAQ: Common Questions About Finding Leaks Without Attic Access
Why is my cathedral ceiling so hard to find a leak in?
Cathedral ceilings have insulation between the rafters, a vapor barrier, and drywall — all between the roof deck and the living space. Water can enter at the ridge, run down between the insulation and the deck for 10 feet, hit a rafter, run sideways along the rafter another 5 feet, and finally drip through a drywall seam. The path is complex because there are multiple layers for the water to travel between, and none of those layers are visible from inside the house.
Can I rent a thermal camera instead of hiring a pro?
Yes. Home improvement stores rent thermal cameras for $50 to $80 per day. The camera plugs into a smartphone and displays a thermal image in real time. The technique is the same as the professional method: scan the ceiling in the early morning and look for cold spots. The rental camera is less sensitive than professional equipment, but it is sufficient to find a large wet area in the insulation. A small leak that has not saturated much insulation may not show up on a rental camera.
Without an Attic, the Water Test Is Your Only Reliable Tool
The sequence for finding a roof leak without attic access is: (1) map the interior stain to a roof search area using exterior reference points, (2) inspect from the ground and from a ladder, (3) run the one-person water test with a 10-minute timer per section, (4) try a dye test if plain water does not work, (5) hire a thermal imaging scan or cut an inspection hole in the ceiling if all else fails.
The water test with a garden hose finds the leak 90% of the time. The 10% of leaks that escape the hose are almost always at the ridge, at a parapet wall cap, or at a through-wall chimney flashing — locations where water enters from a direction the hose cannot simulate. For those leaks, cut the inspection hole or call a pro with a thermal camera.