Floor sanding isn’t just a simple job. It’s an art that demands careful attention to detail, skill, and a strong focus on quality control. In this article, we’re going to look at the fine points of professional floor sanding and highlight how crucial quality control is for perfect results.
The Basics of Floor Sanding
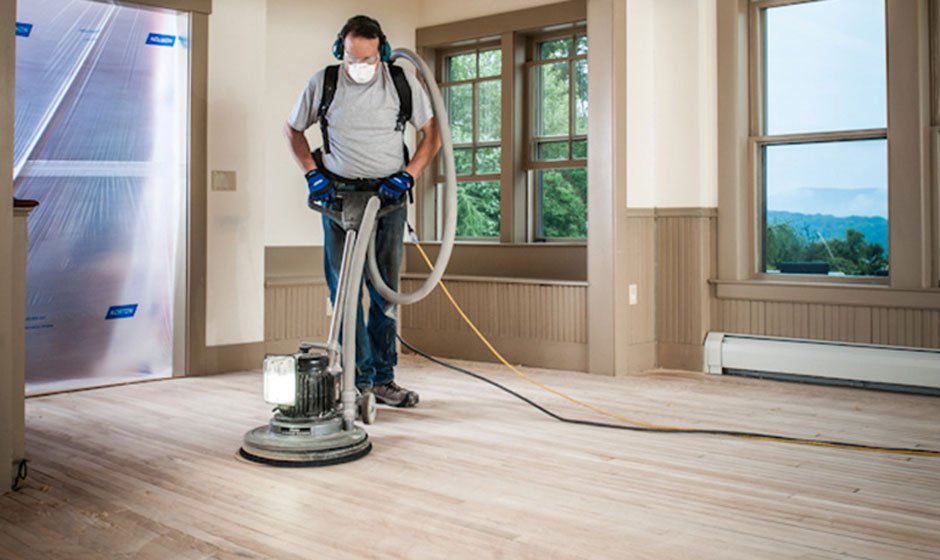
Let’s explore the essentials of working on wooden floors. Think of it as removing the top part of a wooden floor with special abrasive tools. It’s like giving your hardwood a complete refresh. This is especially vital for hardwood floor sanding, as it’s key to maintaining their beauty and durability. Floor sanding plays a huge role in reviving old surfaces, making them look and feel brand new. It’s not just about the appearance; proper sanding also protects the floor, making it last longer.
The Role of Quality Control
Quality control in floor sanding means making sure every part of the process is done to the highest standard. This involves:
- Selecting Proper Equipment: It’s essential to choose the right sander and sandpaper grit. Using the wrong ones can lead to a rough finish or even damage to the wood.
- Preparation: Properly preparing the area is key. This involves cleaning the floor, removing any old finishes, and ensuring the space is free of dust.
- The Refinishing Process: A careful and comprehensive approach is needed to achieve a smooth, even surface. This requires using different grades of sandpaper and multiple passes.
- Final Steps: After the main work, the floor should be thoroughly cleaned and readied for the last coating. The type of finish selected greatly affects both the appearance and durability of the floor.
Step-by-Step Guide to Quality Floor Sanding
1. Getting Ready
- Empty the Room: Take out all the furniture, carpets, and things that can be moved.
- Clean the Floor: Sweep and use a vacuum to get rid of dust and small bits.
- Check and Fix: Look for any nails, staples, or sharp bits. Pound any sticking-out bits flat and use wood filler for big cracks or holes.
2. First Round of Sanding
- Necessary Tools: Start with a large machine like a drum or belt sander.
- Sandpaper Choice: Begin with coarse sandpaper (36-40 grit).
- Method: Move along the grain of the wood, starting from one corner and covering the entire hardwood.
- Objective: Remove old paint, stains, and surface damage.
- Following Actions: After the initial pass, switch to a finer sandpaper (60 grit) to begin smoothing the surface.
3. Middle Sanding
- Sandpaper Selection: Use medium-grit sandpaper (80-100 grit).
- Tools for Small Areas: Employ a smaller tool for hard-to-reach spots like corners and edges.
- Purpose: Further smooth the surface and prepare it for the final smoothing step.
4. Last Sanding
- Type of Sandpaper: Use very fine sandpaper (120-150 grit).
- Main Focus: Make the floor very smooth and polished.
- Extra Care: Look for any spots you missed or areas that need more smoothing.
5. Clean-Up
- After Sanding: Vacuum the hardwood floor and use a tack cloth or slightly wet mop to clean.
- Final Check: Make sure there are no missed spots, scratches, or uneven areas.
Additional Advice:
- Always wear safety gear like masks and eye protection when sanding.
- Make sure there’s good airflow while you work.
- Be careful with the sander to keep the hardwood even and avoid harming the hardwood.
- Take short breaks to see how it’s going and change your approach if needed.
Best Practices for Professional Results
Even Pressure: Keep the pressure consistent while working. This helps avoid creating deep marks or uneven areas. Be careful not to tilt or push down too hard with the tool.
Dust Management: Use tools that have dust collection systems or connect them to a vacuum. This helps keep the work area clean, improves the final look, and keeps the air quality better.
Regular Checks: Take breaks to look over the hardwood. Check for spots you might have missed, any unevenness, or spots where the old finish is still there. Fix these spots right away for an even appearance.
Working Pattern: Work systematically to cover the entire floor evenly. Make sure each new path slightly overlaps the previous one to avoid leaving any gaps.
Why Quality Control Matters
Quality control in the process of hardwood sanding is not just about adhering to a set of standards; it’s about ensuring the longevity, beauty, and value of your wooden floors. Let’s delve deeper into why these aspects are so critical:
1. Durability: Extending the Lifespan of Your Floor
Even Wear and Tear: Proper sanding removes imperfections and ensures an even surface, which results in uniform wear over time. This prevents areas of concentrated wear, which can lead to premature deterioration.
Foundation for Protective Coatings: Quality sanding creates the ideal surface for finishes to adhere to. This is vital because a well-applied finish acts as a protective layer against scratches, dents, and moisture, significantly extending the floor’s life.
Impact on Refinishing Cycles: A well-sanded hardwood floor can reduce the frequency of refinishing required over the years. Floors that aren’t properly sanded may need more frequent refinishing due to poor finish adhesion or uneven wear.
2. Aesthetics: Achieving a Beautiful and Even Finish
Smooth and Consistent Look: Quality sanding eliminates scratches, stains, and old finish, revealing the natural beauty of the hardwood. The even surface reflects light uniformly, enhancing the wood’s colour and grain.
Preparation for Staining: For hardwood that will be stained, thorough sanding is crucial. Uneven or improper sanding can lead to blotchy or inconsistent staining, detracting from the overall appearance.
Seamless Integration: In homes or buildings where new wood flooring is integrated with existing flooring, quality sanding ensures that both old and new sections blend seamlessly, maintaining a consistent aesthetic throughout.
3. Value: Enhancing Your Property’s Worth
Increased Home Value: Professionally sanded floors are a significant selling point in real estate. They enhance the overall appeal of a home, contributing to a higher market value.
Cost-Efficiency in the Long Run: Investing in quality sanding may have higher upfront costs, but it pays off in the long term. Floors that are well-maintained require less frequent repairs and replacements, translating to cost savings.
Attractiveness to Potential Buyers or Renters: Beautifully finished floors are often a key factor for buyers or renters when choosing a property. They contribute to the property’s overall ambience and charm, making it more desirable in the competitive real estate market.
Summary
In summary, professional hardwood floor sanding is a meticulous process that goes beyond mere aesthetics. By adhering to strict quality control measures, it ensures the durability, beauty, and enhanced value of hardwood floors. In this process, from the initial prep to the final smoothing and cleaning, a detailed and careful method ensures a finish that goes beyond just meeting expectations. It highlights the need for precision and attention in every step of working on your floor.