Crafting has surged in popularity as a meaningful way to relieve stress, develop new skills, and bring a personal touch to everyday life. Whether you knit, paint, scrapbook, or sew, having a dedicated home craft studio transforms scattered hobby sessions into focused, productive creative work.
Why a Dedicated Craft Space Enhances Creativity
When it comes to stocking your space, exploring different sourcing options — like browsing a craft warehouse for bulk essentials such as adhesives, fabrics, and tools — is one practical strategy among many for building a well-supplied studio. This guide walks through the key steps to set up, organize, and maintain a space that genuinely supports your creative practice.
A clutter-free, purpose-built workspace carries real psychological benefits: it reduces decision fatigue and helps you move from idea to finished project far more efficiently. Even modest spaces can work beautifully when thoughtfully arranged. Prioritize adequate natural light supplemented by full-spectrum artificial lighting, and make sure there’s proper ventilation whenever you’re working with paints, resins, or adhesives. For ergonomics, a seated workstation height of 28–30 inches significantly reduces strain during long crafting sessions. Before committing to any layout, run a quick space assessment:
- Measure the available area and note the ceiling height.
- Evaluate existing electrical outlets and lighting.
- Identify quiet zones versus high-traffic areas.
A spare closet, for example, can become a surprisingly productive crafting nook when outfitted with a fold-down work surface and wall-mounted storage — proof that square footage matters far less than thoughtful planning.
Selecting the Right Equipment and Tools
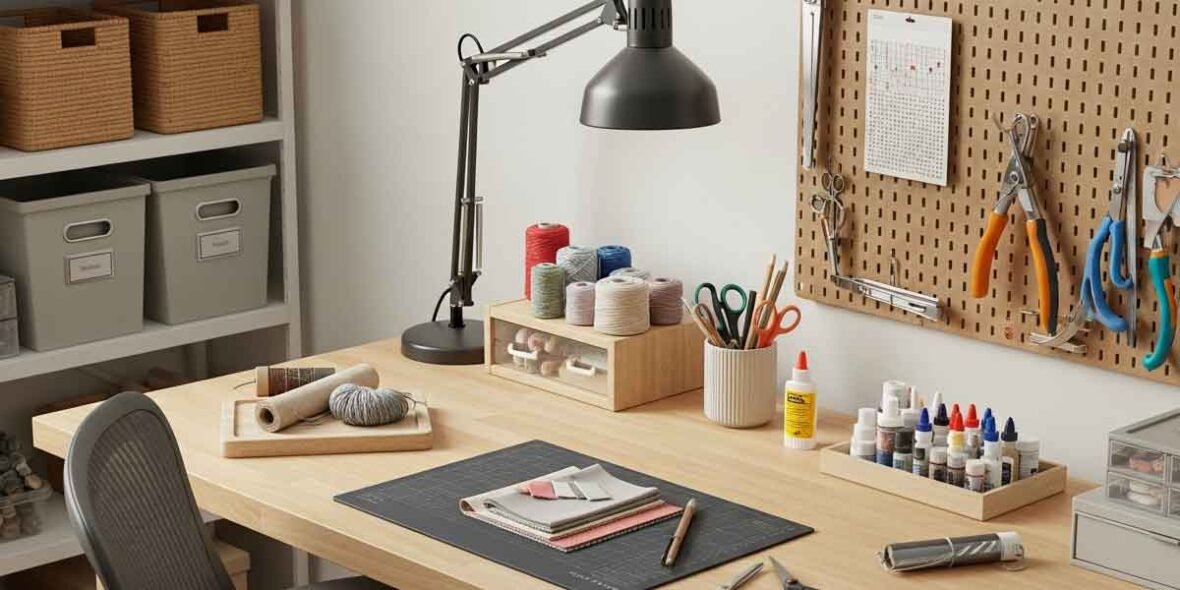
Choosing tools wisely matters far more than simply owning a lot of them. Start with core categories: cutting tools, adhesives, and storage solutions. For beginners, basic hand tools are more than sufficient, but as precision demands grow — say, when cutting through multiple fabric layers — upgrading to rotary cutters dramatically improves both accuracy and speed. Similarly, modular shelving adapts as your material collection expands, making it a smarter long-term investment than fixed cabinetry. For yarn-based crafts, referencing standards from organizations like the Craft Yarn Council can help guide appropriate tool selection based on yarn weight and fiber type.
Smart Organization Strategies for Efficiency
Storage Solutions by Material Type
Match your storage to your materials: small beads belong in labeled drawers, yarn stores well in open bins, and tools stay most accessible on pegboards. Vertical space is often the most underused resource in a home studio — wall-mounted racks and over-door organizers can dramatically increase capacity without expanding your footprint. A reliable labeling system paired with basic inventory tracking prevents duplicate purchases and unnecessary material waste.
Workflow Optimization
Divide your studio into functional zones: a prep area for measuring and cutting, an assembly station for construction, and a finishing corner for drying, pressing, or final touches. Rolling carts add real flexibility, allowing materials to travel with you between zones as a project evolves. It’s also worth considering the 5S method — Sort, Set in order, Shine, Standardize, Sustain — originally developed for lean manufacturing but remarkably effective when applied to craft studio management.
Sourcing Supplies Without Breaking the Bank
Buying in bulk, subscribing to seasonal supply boxes, and repurposing household containers are all solid ways to keep costs in check. Test material samples before committing to large quantities — a quilter, for instance, might source cotton fabrics seasonally to maintain variety while keeping inventory manageable. Understanding material properties matters here too: cotton offers breathability and ease of cutting, while polyester blends provide greater durability, making each better suited to different project types.
Maintenance and Evolution of Your Craft Studio
Routine upkeep — dusting tools, rotating stock, and safely disposing of expired solvents — keeps the space both functional and safe. As your skills develop, technology like digital cutting machines can be added incrementally rather than all at once. Reconfiguring zones to accommodate new hobbies, such as resin art or woodworking, keeps the studio relevant over time without requiring a complete overhaul.
Building Your Creative Sanctuary
A thoughtfully planned home craft studio elevates every aspect of your creative practice — from faster project starts to more satisfying finishes. Begin small, refine based on actual use, and treat the space as an evolving creative sanctuary rather than a finished product. To experience an immediate benefit, try one of these quick wins this week:
- Clear one shelf and label it for a single material category.
- Test a new organization tool, like a pegboard hook or rolling cart.
- Sketch a simple zone layout tailored to your next project.
Small, intentional steps consistently lead to the most functional — and inspiring — creative spaces.