It may be quite expensive to fix a leaky pipe in your home or yard in addition to being a hassle. You want to avoid thinking about the expense of replacing a broken pipe right now if your water biis already exorbitantly high. However, the plumbers in Altona say if the issue is not fixed, it will worsen and cost more money over time. What should you do?
We created this step-by-step manual on repairing an underground leaky pipe to assist homeowners with this issue.
1. Find The Leak
BRS Property company advises that you need to identify the source of the leak before doing anything else.
- The simplest method is to look around where the pipe goes underneath and in your yard for any moist patches or mould. There is probably an underground leak someplace if there are moist patches of ground close to the surface in or around your yard or garden beds or if leaves or other debris are floating on top of the water there.
These symptoms might not appear immediately, especially if the leak is in a long-distance subterranean conduit. It’s time to investigate if you see any of these indicators.
- Purchase a water meter: If you may have an underground leak but are unsure of its location, now is the time to purchase a home water meter. These useful tools let you monitor your water use to determine whether there are any changes (such as an increase in use) when the issue first arises.
- To determine the source of the leak, turn off all water sources, then turn them back on one at a time (this procedure works best if you have numerous faucets or sinks).
2. Turn off Water
- Purchase a water meter: If you may hav’e an underground leak but are unsure of its location, now is the time to purchase a home water meter. These useful tools let you monitor your water use to determine whether there are any changes (such as an increase in use) when the issue first arises.
- To determine the source of the leak, turn off all water sources, then turn them back on one at a time (this procedure works best if you have numerous faucets or sinks).
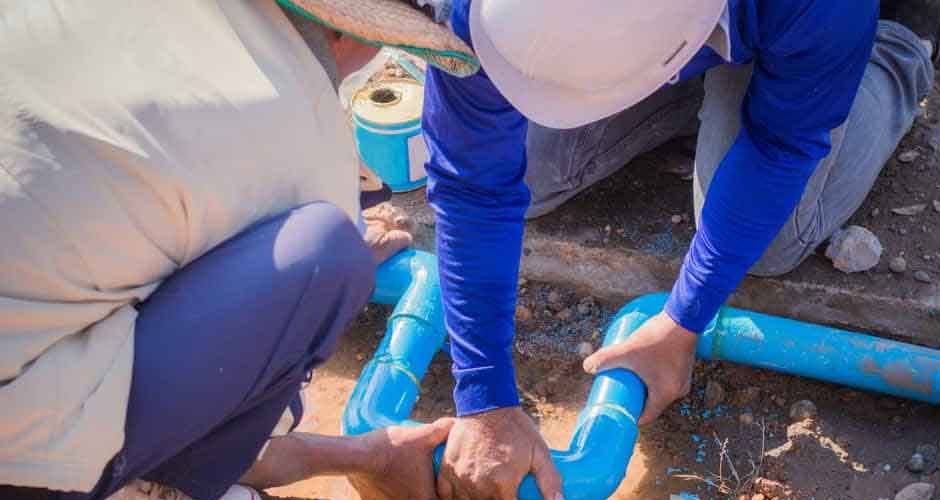
3. Dig Hole
Use a shovel or other digging equipment to create a hole around the faulty pipe that is as deep as necessary after turning off the water supply. You will have space to work and examine your underground water line without descending through the ground and across your grass.
Then, Your Local Plumbing experts suggest clearing away any debris or weeds blocking your pipe so you can see what needs to be done more clearly. Call our crew of skilled plumbers if you don’t have any equipment on hand and need assistance addressing this leak.
4. Remove Damaged Pipe
The next step that plumbers in Altona suggest to dig a space around your old pipe using a shovel or other digging implement. In the next phases, this will simplify removing and replacing. Remove any screws holding the broken pipe part in place with a screwdriver or other instrument before pulling it from the ground.
Remove any dirt and debris gathered within the hole where the leaking pipe was removed. Clean out any dirt that could have gotten into this region during the repair procedure using a garden hose or other cleaning equipment.
5. Cut New Pipes After Measuring
To determine how much pipe has to be replaced so you can purchase adequate replacement components for your repair operation, measure the distance between your leaking pipe and your water meter. To achieve the correct fit, remember to measure your diameter as well.
If you already have a new piece of pipe cut to size, push it in and fasten it with screws. If not, cut one to the appropriate length with a hacksaw or other cutting device (PVC pipes are simpler to cut through and won’t require a larger machine). If you don’t have any equipment to cut PVC pipe, you may execute this step using a utility knife or pair of scissors (but be careful not to damage the pipe in the process).
This method becomes more difficult if the pipe is constructed of metal or copper. If you’ve done this type of pipe cutting before, you might need a torch to cut and solder copper pipes. Since the plumbing system is crucial and you want to avoid fixing it again anytime soon, it is advisable to call someone qualified for the work if you are unsure of your suitability.
The replacement pipe should be cut using a hacksaw or other cutting device to the same length as the leaking part. By doing this, you may avoid having a segment that is either too short or too long, which could lead to issues in the future.
6. Connect New Pipe to Water Meter
The plumbers in Altona suggest using a wrench to tighten the new pipe until it is securely in place by inserting one end into the hole above your water meter. Apply PVC cement between the ends of your replacement pipe after using sandpaper to clean them both, and let it cure overnight before using it again.
7. Refill The Hole
It’s time to fill the trench with earth to make it seem as similar to how it was before you started working on it as possible after repairing your pipes and ensuring everything functions. Once your pipes are fixed, fill the trench with earth and compact it using a tamper or other tamping instrument. Ensure all the earth is securely packed around the pipe so that water can no longer seep under it. After that, run all faucets until they are clear to flush the system.
Contact Your Local Plumbing and Get Your Pipes Fix Soon!
Understanding how to repair an underground leak in a water pipe is crucial because, if left unattended, it might result in costly component replacements or, worse still, the need to dig up your entire yard.
Fortunately, there are some basic leak solutions that anybody can perform, and we hope that we have clarified some things for you. And if you have any more inquiries, contact our experts at Your Local Plumbing.